Suzuki Grand Vitara: Speedometer/Odometer/Tripmeter/Brightness Control
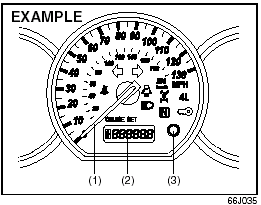
Speedometer/Odometer/Tripmeter/Brightness
Control (1) Speedometer. (2) Odometer/Tripmeter. (3) Odometer/Tripmeter selector,
Brightness control knob.
Speedometer
The speedometer indicates vehicle speed in km/h and miles/h.
Odometer/Tripmeter
When the ignition switch is turned to “ON”, the display shows the odometer or tripmeter. The odometer records the total distance the vehicle has been driven. The tripmeter can be used to measure the distance traveled on short trips or between fuel stops.
CAUTION: Keep track of your odometer reading and check the maintenance schedule regularly for required services. Increased wear or damage to certain parts can result from failure to perform required services at the proper mileage intervals.
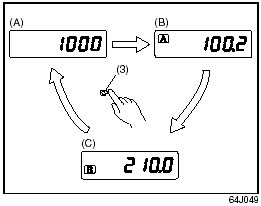
When the ignition switch is turned to the “ON” position, the display shows the odometer or trip meter. The display shows three types of indication; odometer, trip meter A and trip meter B. Push the selector knob (3) quickly to switch the indication among the three. You can use the two trip meters (A and B) independently.
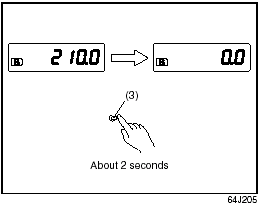
Hold in the selector knob for about 2 seconds to reset the trip meter to zero.
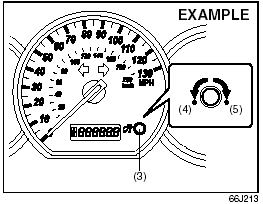
Brightness Control
(3) Brightness control knob (4) In this position, the meter lights are the dimmest
and the other instrument panel lights are turned off. (5) In this position, the
instrument panel lights are the brightest.
Your vehicle has a system to automatically dim the instrument panel lights when the ignition switch is in the “ON” position and the lighting switch is either (a) turned to the second or third position, or (b) turned to the “AUTO” position and it is dark around the light sensor. The level of brightness depends on the position of the brightness control knob (3). To reduce the brightness and activate the automatic dimming feature, turn the knob (3) counterclockwise. When the knob (3) is turned counterclockwise to position (4), the meter brightness becomes dimmest and the other instrument panel lights are turned off. To brighten the instrument panel lights, turn the knob (3) clockwise. To cancel the automatic dimming feature and maintain full brightness, turn the knob (3) clockwise to position (5).
Tachometer
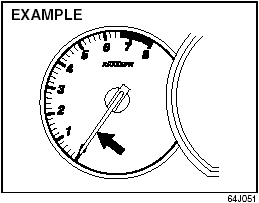
Tachometer
The tachometer indicates engine speed in revolutions per minute.
CAUTION: Never drive with the engine speed indicator in the red zone or severe engine damage can result.
Fuel Gauge
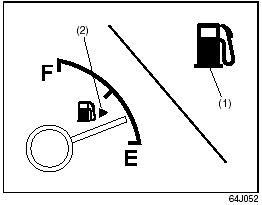
Fuel Gauge
This gauge gives an approximate indication of the amount of fuel in the fuel tank. “F” stands for full and “E” stands for empty. If the indicator gets off the graduation of “E” (not character “E”), refill the tank as soon as possible.
NOTE: The indicator moves a little depending on road conditions (for example, slope or curve) and driving conditions because of fuel moving in the tank.
If the low fuel warning light (1) comes on, fill the fuel tank immediately.
CAUTION: Avoid driving with an extremely low fuel level. Running out of fuel could cause the engine to misfire, damaging the catalytic converter.
NOTE: The activation point of the low fuel warning light (1) varies depending on road conditions (for example, slope or curve) and driving conditions because of fuel moving in the tank.
The mark (2) indicates that the fuel filler door is located on the right side of the vehicle.
Temperature Gauge
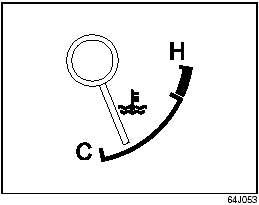
Temperature Gauge
When the ignition switch is in the “ON” position, this gauge indicates the engine coolant temperature. Under normal driving conditions, the indicator should stay within the normal, acceptable temperature range between “H” and “C”. If the indicator goes outside this range and approaches “H”, overheating is indicated. Follow the instructions in the “If the Engine Overheats” of “Emergency Remedies” section.
CAUTION: Continuing to drive the vehicle when engine overheating is indicated can result in severe engine damage.
“PASS AIR BAG OFF” Indicator
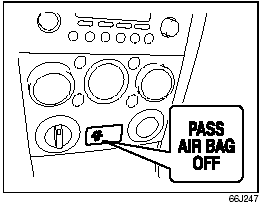
“PASS AIR BAG
OFF” Indicator
The “PASS AIR BAG OFF” indicator is located on the center of the instrument panel. When the ignition switch is turned to the “ON” position, this indicator comes on for several seconds to let you know the indicator is working. While this indicator is turning on, the front passenger’s front air bag and seat belt pretensioner will be disabled. For details about the front passenger sensing system, refer to “Supplemental Restraint System (air bags)” in the “BEFORE DRIVIING” section.
Hazard Warning Switch
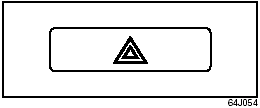
Hazard Warning
Switch
Push in the hazard warning switch to activate the hazard warning lights. All four turn signal lights and both turn signal indicators will flash simultaneously. To turn off the lights, push the switch again. Use the hazard warning lights to warn other traffic during emergency parking or when your vehicle could otherwise become a traffic hazard.
Rear Window Defroster and Outside Rearview Mirrors Defroster (if equipped) Switch
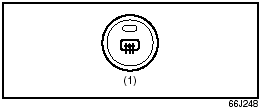
Rear Window Defroster
and Outside Rearview Mirrors Defroster (if equipped) Switch
When the rear window is fogged, push this switch to clear the window.
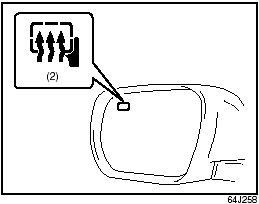
If the outside rearview mirror has the mark (2), it is also equipped with the outside rearview mirrors defroster. When you push the switch (1), both the outside rearview mirrors defroster and the rear window defroster will operate simultaneously.
An indicator light will be lit when the defroster is on. The defroster will only work when the engine is running. To turn off the defroster, push the switch again.
CAUTION: The rear window defroster and the outside rearview mirrors use a large amount of electricity. Be sure to turn off the defroster after the window has become clear.
Front Fog Light Switch (if equipped)
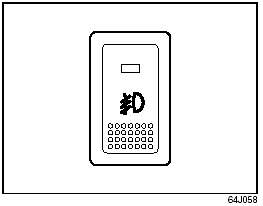
Front Fog Light
Switch (if equipped)
The front fog light comes on when the fog light switch is pushed in with:
• the lighting switch turned to the third position and the beams set to the low
beam position, or
• the auto-on headlight system on and the beams set to the low beam position.
“ESP OFF” Switch
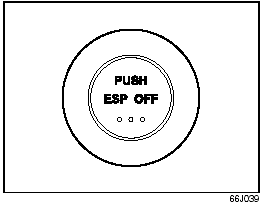
“ESP OFF” Switch
ESP® is a registered trademark of DaimlerChrysler AG. The “ESP OFF” switch is located on the center of the instrument panel. You can turn the ESP® systems (other than ABS) on or off using this switch. To turn off the ESP® systems (other than ABS), push and hold the “ESP OFF” switch until the “ESP OFF” indicator light comes on. To turn on all of the ESP® systems, push the “ESP OFF” switch again. The “ESP OFF” indicator light will go out.
NOTE:
• If the vehicle speed is greater than approximately 30 km/h (19 mph), the ESP®
systems (other than ABS) will turn on automatically.
• If the transfer switch (if equipped) is turned to the “4L LOCK” position, the
ESP® systems (other than ABS) will be canceled automatically.
• If the ESP® systems operates continuously, such as when driving on slippery roads,
the traction control functions of the ESP® systems may be canceled temporarily to
avoid overheating the brake pads. After a short period of time, the ESP® systems
(other than ABS) will turn on automatically and the “ESP OFF” indicator light will
go out.
For details of the ESP® systems, refer to “Electronic Stability Program (ESP®)” in the “OPERATING YOUR VEHICLE” section.
Transfer Switch (if equipped)
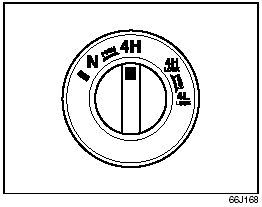
Transfer Switch
(if equipped)
The transfer switch is located on the center of the instrument panel. For details on how to use this switch, refer to “Using the Transfer Switch” in the “OPERATING YOUR VEHICLE” section.
Glove Box
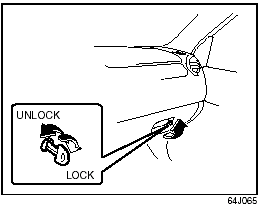
Glove Box
To open the glove box, pull the latch lever. To close it, push the lid until it latches securely. If a lock is equipped on the latch lever, lock the glove box by inserting the key and turning it clockwise and unlock the glove box by turning the key counterclockwise.
 WARNING: Never drive with the
glove box lid open. It could cause injury if an accident occurs.
See also:
Cooling system
Never attempt to remove the radiator
cap until the engine has been
shut off and has cooled down
completely. Since the coolant is
under pressure, you may suffer
serious burns from a spray of boiling
hot coolant when the cap is
remove ...
Engine Oil and Filter
Specified Oil
(1) Preferred
Use engine oil with the American Petroleum Institute Certified For Gasoline Engines
“Starburst” symbol. Select the appropriate oil viscosity according to the above
chart. We highly recommend you use SAE 5W- 30 o ...

 Warning and Indicator Lights