Suzuki Grand Vitara: Folding Seats
Folding Rear Seats
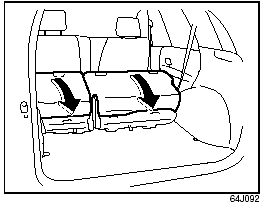
To fold the rear seats forward: 1) Remove the luggage compartment cover.
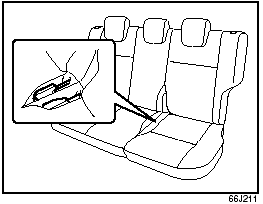
2) Stow the seat belt buckles of the center and left seating position into the pocket of the seat cushion as shown in the illustration.
CAUTION: When you fold the rear seatback forward, stow the seat belt buckles of the center and left seating position into the pocket first. This helps prevent being caught by the seat and being damaged.
3) Lower the adjustable head restraint fully.
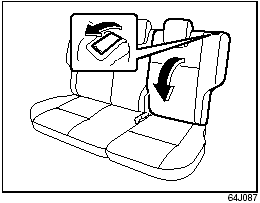
4) Pull the release lever forward on the top of each split seat, and fold the seatbacks forward.
CAUTION: Make sure the belt webbing is not caught by the seat.
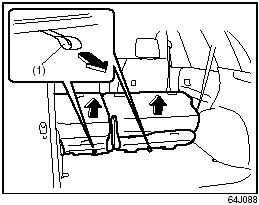
5) Pull the lock release strap (1) rearward to unlatch the seat cushion.
 WARNING: When you unlatch the
rear seat cushion, be careful that your face or hands are not injured from the seat
popping up.
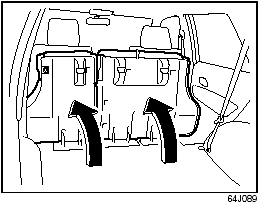
6) Fold the entire seat forward.
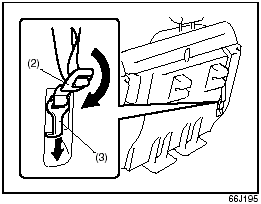
7) Push down the adjuster (2) to make the strap slack, and then unhook the strap by pushing down the hook (3).
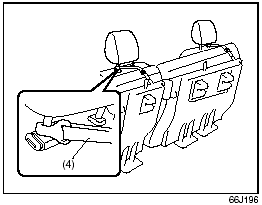
8) Hook the strap (4) to the front seat head restraint and re-tighten the adjuster (2) to apply a tension on the strap as shown in the illustration.
CAUTION: When securing the folded rear seat with a strap, adjust the strap length so that the rear seat will not move.
 WARNING: Luggage or other cargo
should be stowed in the luggage compartment with the rear seat in an upright position,
whenever possible. If you need to carry cargo in the passenger compartment with
the rear seat back folded forward, be sure to secure the cargo or it may be thrown
about, causing injury. Never pile cargo higher than the seatbacks.
To return the seat to the normal position, follow the procedure below.
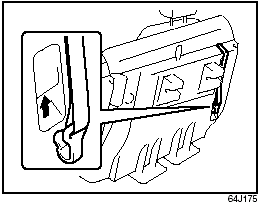
1) Unhook the strap from the head restraint and stow the strap to the back of the seat cushion.
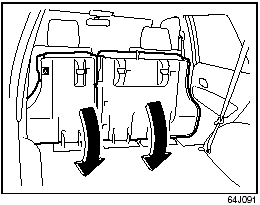
2) Pull down the seat cushion until it locks into place.
 WARNING: When returning the rear
seat cushion to the normal position, be careful that your finger is not caught between
the lock and the floor.
CAUTION:
• When returning the rear seat cushion to the normal position, make sure that there
is nothing around the striker. This prevents the seat cushion from being locked
securely.
• When returning the rear seat cushion to the normal position, make sure that there
is nothing under the seat cushion. This prevents damage to the seat cushion.
3) Raise the seatback until it locks into place.
After returning the seat, try moving the seat and seatback to make sure they are securely latched.
Armrest
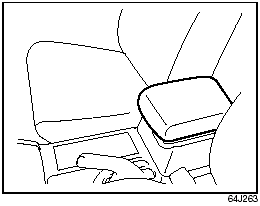
Center Console
Armrest
CAUTION: To avoid damage to the armrest, do not lean on it or allow a child to sit on it.
Sun Visor
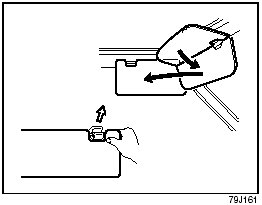
Sun Visor
The sun visors can be pulled down to block glare coming through the windshield, or they can be unhooked and turned to the side to block glare coming through the side window.
CAUTION: When unhooking and hooking a sun visor, be sure to handle it by the hard plastic parts or the sun visor can be damaged.
Interior Light Switch
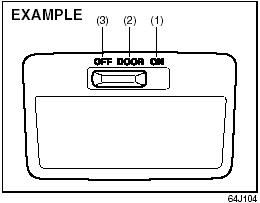
Center
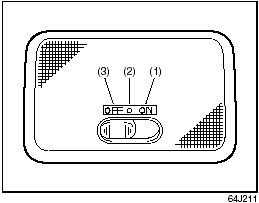
Rear
This light switch has three positions which function as described below:
(1) The light comes on and stays on regardless of whether the door is open or closed. (2) The light comes on when the door is opened. After closing all doors (including the tailgate), the light will remain on for about 15 seconds and then fade out. If you insert the key into the ignition switch during that time, the light will start to fade out immediately. After removing the key from the ignition switch, the light will turn on for about 15 seconds and then fade out. (3) The light remains off even when the door is opened.
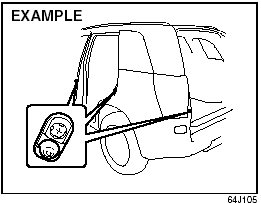
NOTE: The number of doors involved in the lighting operation of the interior light depends on the vehicle specification. If there is a switch (rubber projection) at the door opening as shown, the door is involved in the lighting operation.
Spot Light
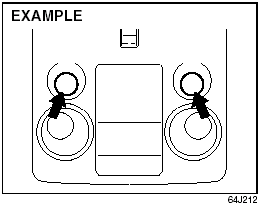
Spot Light
Push the switch to turn on the light and push it again to turn off the light.
Luggage Compartment Light
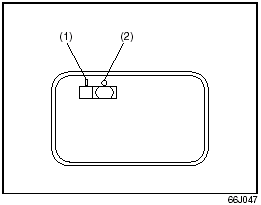
Luggage Compartment
Light
The luggage compartment light is located at the left side of the rear luggage compartment. When you open any of the doors including the tailgate with the luggage compartment light switch in the “ON” position (1), the light comes on and remains on as long as you keep the door open. After closing all doors, the light will remain on for about 15 seconds and then fade out. If you insert the key into the ignition switch during that time, the light will start to fade out immediately. After removing the key from the ignition switch, the light will turn on for about 15 seconds and then fade out. When the luggage compartment light switch is in the “OFF” position (2), the light remains off regardless of whether the door(s) is(are) opened or closed.
Front Seat Heater (if equipped)
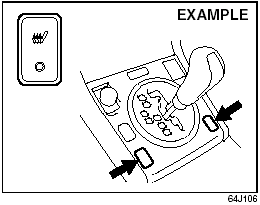
Front Seat Heater
(if equipped)
With the ignition switch in the “ON” position, push in one or both of the seat heater switches to warm the corresponding seat(s). The indicator light below the switch will also come on. To turn off the seat heater, push in the switch again. The indicator light below the switch will go off.
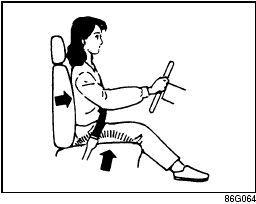
 WARNING: Improperly using the
seat heater can be hazardous. An occupant can suffer burns even if the heating temperature
is fairly low, if the occupant is wearing thin pants, a thin skirt or shorts and
leaves the heater on for long periods. Avoid using the seat heater for these occupants:
• People who have reduced feeling in their legs, including the elderly or those
with certain disabilities.
• Small children, or anyone with sensitive skin.
• People who are asleep or under the influence of alcohol or other drugs which make
them tired.
CAUTION: To avoid damaging the heater element:
• Do not subject the front seats to heavy impacts, such as children jumping on them.
• Do not cover the seat with any insulating materials such as blankets or cushions.
Assist Grips (if equipped)
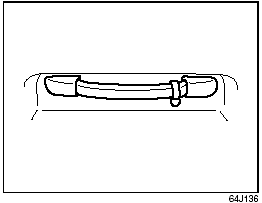
Assist Grips (if
equipped)
Assist grips are provided for convenience.
Coat Hooks (if equipped)
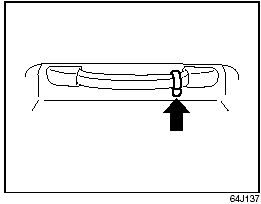
Coat Hooks (if
equipped)
You can hang clothing on the coat hooks. These hooks are not designed for large or heavy items.
 WARNING: If your vehicle is equipped
with side curtain air bags, do not hang sharp items like a hanger on the coat hook.
When hanging the clothes, hang it on hook without using a hanger.
See also:
Warning
WARNING: You should take extreme care when working on your vehicle to prevent accidental injury. Here are a few precautions that you should be especially careful to observe:
• To prevent damage or unintended inflation of the air bag sys ...
Remote keyless entry (RKE)
This system allows you to lock or unlock the doors and
liftgate or activate the Panic Alarm from distances up to
approximately 66 ft (20 m) using your Remote Keyless
Entry (RKE) transmitter. The RKE transmitter does not
need to be pointed at ...

 Parking Brake Lever