Suzuki Grand Vitara: Engine Coolant
Selection of Coolant
To maintain optimum performance and durability of your engine, use SUZUKI Genuine
Coolant or equivalent. This type of coolant is best for your cooling system as it:
• Helps maintain proper engine temperature.
• Gives proper protection against freezing and boiling.
• Gives proper protection against corrosion and rust. Failure to use the proper
coolant can damage your cooling system. Your authorized SUZUKI dealer can help you
select the proper coolant.
CAUTION: To avoid damaging your cooling system:
• Always use a high quality ethylene glycol base phosphate type coolant diluted
with distilled water at the correct mixture concentration.
• Make sure that the proper mix is 50/ 50 coolant to distilled water and in no case
higher than 70/30. Concentrations greater than 70/30 coolant to distilled water
will cause overheating conditions.
• Do not use straight coolant nor plain water.
• Do not add extra inhibitors or additives. They may not be compatible with your
cooling system.
• Do not mix different types of base coolants. Doing so may result in accelerated
seal wear and/or the possibility of severe overheating and extensive engine/automatic
transmission damage.
Engine Coolant Level Check
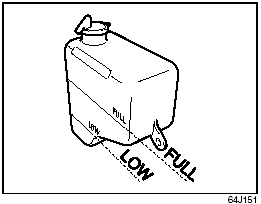
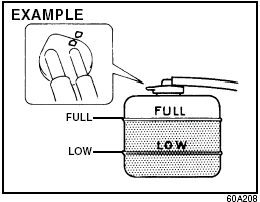
Check the engine coolant level at the reserve tank, not at the radiator. With the engine cool, the engine coolant level should be between the “FULL” and “LOW” marks.
Adding Engine Coolant
If the engine coolant level is below the “LOW” mark, more engine coolant should be added. Remove the reserve tank cap and add engine coolant until the reserve tank level reaches the “FULL” mark. Never fill the reserve tank above the “FULL” mark.
CAUTION:
• The mixture you use should contain 50% concentration of antifreeze.
• If the lowest ambient temperature in your area is expected to be –35 °C (–31°F)
or below, use higher concentrations up to 60% following the instructions on the
antifreeze container.
• When putting the cap on the reserve tank, line up the arrow on the cap and the
arrow on the tank. Failure to follow this can result in coolant leakage.
 WARNING: Engine coolant is harmful
or fatal if swallowed or inhaled. Do not drink antifreeze or coolant solution. If
swallowed, do not induce vomiting. Immediately contact a poison control center or
a physician. Avoid inhaling mist or hot vapors; if inhaled, remove to fresh air.
If coolant gets in eyes, flush eyes with water and seek medical attention. Wash
thoroughly after handling. Solution can be poisonous to animals. Keep out of the
reach of children and animals.
Engine Coolant
Replacement
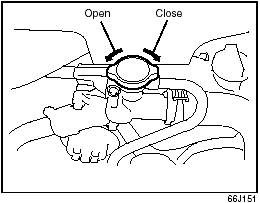
1) When the engine is cool, remove the radiator cap by turning it slowly to the left until a “stop” is felt. Do not press down while turning the cap. Wait until any pressure is released, then press down on the cap and continue turning it to the left.
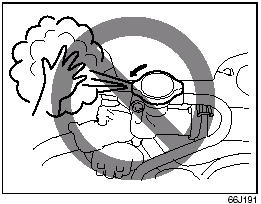
 WARNING: It is hazardous to remove
the radiator cap when the engine coolant temperature is high, because scalding fluid
and steam may be blown out under pressure. Wait until the engine coolant temperature
has lowered before removing the cap.
2) Remove the reservoir by lifting it up, and drain the reservoir completely.
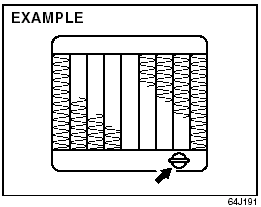
3) Loosen the drain plug attached to the lower part of the radiator and drain the engine coolant into a suitable container. 4) Reinstall the reservoir and fill it with engine coolant to the “FULL” line. 5) Tighten the drain plug on the radiator, fill the radiator with engine coolant and install the radiator cap. 6) After filling, let the engine idle for about 2 – 3 minutes to get rid of air in the cooling system. Then, stop the engine. 7) Check the engine coolant level in the radiator again. If the level has gone down, add more engine coolant.
CAUTION: The engine coolant must be replaced with the vehicle on level ground.
Windshield Washer Fluid
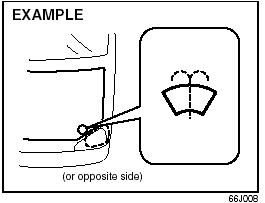
Front and rear
(if equipped)
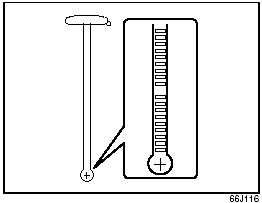
Check that there is washer fluid in the tank by looking at the washer fluid level gauge which is attached to the cap of the washer fluid tank. If the fluid level is near empty, refill it. Use a good quality windshield washer fluid, diluted with water as necessary.
 WARNING: Do not use “anti-freeze”
solution in the windshield washer reservoir. This can severely impair visibility
when sprayed on the windshield, and also damage your vehicle’s paint.
CAUTION: Damage may result if the washer motor is operated with no fluid in the washer tank.
Air Cleaner
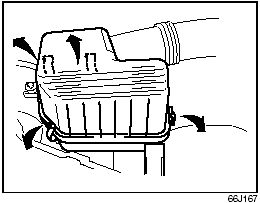
Air Cleaner
If the air cleaner is clogged with dust, there will be greater intake resistance, resulting in decreased power output and increased fuel consumption. Check and clean periodically according to the following procedure: 1) Take off the air cleaner case cover. Remove the element from the air cleaner case cover. 2) This air cleaner element is of dry type. Remember that it needs cleaning according to the following method. 3) Blow off dust on cleaner element by compressed air from inside the element, or replace the element as necessary.
CAUTION: The air cleaner element should be replaced every 50000 km (30000 miles). More frequent replacement is necessary when you drive under dusty conditions.
Spark Plugs
Spark Plugs
Spark Plugs
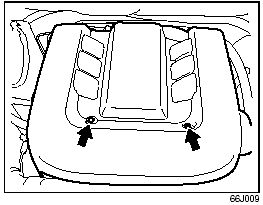
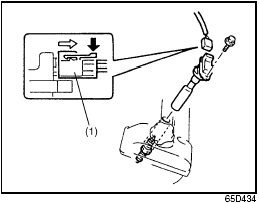
You should inspect spark plugs periodically for carbon deposits. When carbon accumulates on a spark plug, a strong spark may not be produced. Remove carbon deposits with a wire or pin and adjust the spark plug gap. To access the spark plugs: 1) Remove the engine cover. 2) Disconnect the coupler (1) while pushing the release lever. 3) Remove the bolt. 4) Pull the ignition coil out.
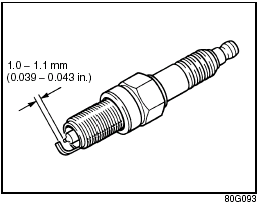
CAUTION: When replacing spark plugs, you should use the brand and type specified for your vehicle. For the specified plugs, refer to the “SPECIFICATIONS” section at the end of this book. If you wish to use a brand of spark plug other than the specified plugs, consult your SUZUKI dealer.
See also:
Convertible seats
Securing a convertible seat with a seat
belt
Do not place the convertible seat in the front passenger's seat
NOTE
Refer to pages 47 and 48 for information
on securing a child restraint using ISOFIX/LATCH lower anchors and/or top tether
anc ...
Correct driver's seat position
Observe the safety guidelines on seat adjustment ().
Check whether you have adjusted seat 3 properly.
Electrical seat adjustment () When adjusting the seat, make sure:
you are as far away from the driver's air bag as possible.
you a ...

 Automatic Transmission Fluid